Window Light at Noon: Finding a Softer Angle Indoors
A bright window can leave a phone photo harsh and patchy. Follow one invented tabletop scene as small changes to the subject’s position and your shooting angle soften the light without losing its direction.
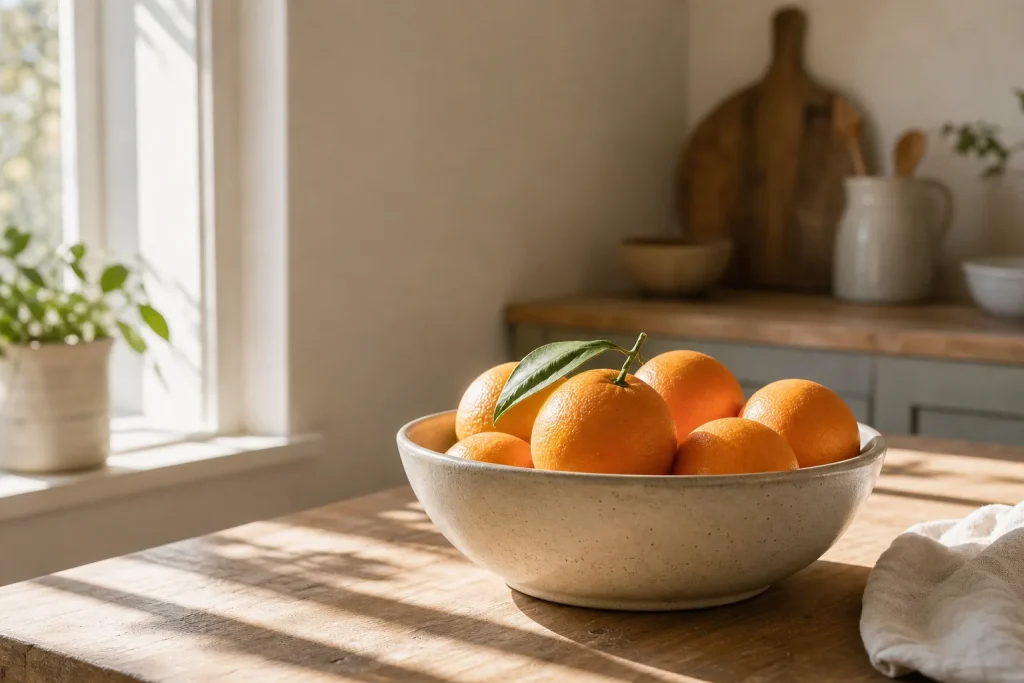
The common mistake with strong noon window light is to point a phone straight at a subject and keep shooting from the first convenient spot. The result can be a bright patch on a mug, a dark stripe across the table and a face or object that looks flatter than it did in person. Before reaching for an editing slider, try moving either the subject or yourself; a small shift can change how the light crosses the whole scene.
Say you are photographing a small bowl of oranges on a kitchen table near a large, uncovered window. This is an invented situation, but a familiar one: the room is bright, the window is on the bowl’s left, and the direct sun makes the nearest orange shine while the far side of the arrangement falls into deep shade. The aim is not to make noon light disappear. It is to find a position where its brightness gives the scene shape without letting one hot spot take over.
What is the window doing to the scene?
Start by looking at the light before looking at the phone screen. Notice where the brightest patch lands, which side of each orange is lit, and where the shadows fall. Direct sun through a clear window tends to create a strong difference between lit and shaded areas. The exact effect depends on the window, the room and the objects between the glass and your subject.
Stand beside the table and turn your head from one side to the other. This simple look around can reveal whether the light is striking the bowl from the side, from behind, or nearly head-on. Side light often shows texture on fruit and ceramic; light from behind can make translucent details glow, but may leave the front of the subject comparatively dark.
Pay attention to reflections as well as shadows. A glazed bowl or polished tabletop may catch a sharp white shape that is more distracting than the light on the fruit. On a phone screen, that reflection can look like a tiny patch of missing detail, so take a moment to shift your viewpoint and see whether it moves.
First identify the brightest distraction. Then decide whether to move the subject, your phone, or both.
What changes when you move the bowl?
In this imagined kitchen, the bowl begins close to the window, where a shaft of direct sunlight crosses its rim. Moving it a little farther into the room changes the light reaching it. The sun may no longer fall directly on the bowl, while light reflected from the walls and ceiling still illuminates it. The transition can be gentler, though the scene may also become dimmer.
Try sliding the bowl back in small increments rather than carrying it across the room. Watch the bright patch on the orange peel and the edge of the shadow on the table. You are looking for a useful balance: the highlights still have detail, and the shaded side is not so dark that the fruit loses its form.
The distance that works depends on the room. A pale wall opposite the window can send soft, useful light back into the scene. A dark cupboard may absorb more of it, leaving the shadow side deeper. If you move the bowl and the result feels dull, bring it slightly closer to the window again, or turn it so the strongest light catches the side you want to describe.
Now turn the bowl rather than moving it. This changes which fruit catches the light and where overlapping shapes cast shadows. A small rotation may reveal a leaf or stem that was hidden, or stop one orange from merging visually with another.
In the invented scene, the photographer slides the bowl farther from the glass and rotates it until the orange with a leaf sits in front. The expected visible result is a less abrupt patch of sun and a clearer outline around that leaf. If the room’s reflected light is weak, the shaded fruit may still look dark; that is a cue to reconsider the angle, not a reason to force the exposure immediately.
How can your shooting angle soften the contrast?
Once the subject is in a better place, move around it. A phone aimed from the window side sees a different arrangement of light and shadow from one aimed from the opposite side. The light itself has not changed, but your view of the lit surfaces, dark surfaces and reflections has.
For the bowl, try standing where the window is off to one side of the phone rather than directly behind it. A side-on viewpoint can show the curve of the fruit and the bowl’s rim, while keeping the brightest reflections from pointing straight into the lens. If the camera faces the window, the bright opening may pull attention away from the subject or prompt the phone to render the foreground too dark.
Then lower or raise the phone. From above, the bowl’s contents become the main subject, and the table shadows may appear shorter or less prominent in the frame. From closer to table height, the oranges overlap more, and their shadows can become strong graphic shapes. Neither viewpoint is automatically softer; choose the one where the contrast supports the arrangement.
Take a few test frames while changing only one thing at a time. First shift your position, then check the screen. Next change the height, and check again. This makes it easier to tell whether a brighter-looking image came from a new angle, a different background, or the phone adjusting its exposure.
Imagine the bowl has moved back from the window, but a hard crescent of glare still sits on the glossy rim. The photographer steps slightly to one side and lowers the phone. In this invented scene, the expected result is that the reflection moves away from the most visible part of the rim, while the orange peel remains lit from the side. The aim is not to eliminate every highlight; it is to place the brightest one where it helps explain the shape.
What should you do about the dark side?
Strong window light often gives you a choice between keeping the bright area controlled and lifting the shadow. Start by tapping the screen on the subject, then look at both ends of the scene: the brightest peel or ceramic and the darkest fruit. Many phone camera apps let you adjust exposure with a slider after tapping; the control and its appearance vary by phone.
If the highlight looks blank, lower the exposure a little and check whether texture returns. If the shadow becomes too heavy, do not keep brightening until the window side loses its detail. Instead, look for a way to add gentle reflected light. A piece of white card, a pale tea towel or even a light-coloured baking tray placed opposite the window can bounce some light back onto the dark side.
Keep the reflector outside the picture and move it gradually. A white card held close to the bowl may brighten the shadow more than one placed farther away. Watch the phone screen as you adjust it, and check that the reflected light does not create a new, distracting shine.
There is no need to make the two sides equally bright. A little shadow gives the bowl and fruit depth. If the card makes everything look uniformly lit, move it away or angle it so the bounce is subtler.
In the hypothetical kitchen, the photographer props a sheet of white card opposite the window, then checks the bowl from the chosen side angle. The expected observable change is a softer dark edge on the oranges, not a shadow-free scene. If the card itself appears at the edge of the frame, shift it out of view and take the shot again.
How can you check the frame without losing the light?
At noon, a phone screen can make a bright scene look deceptively clear, especially if you are standing in a dimmer part of the kitchen. Shield the display from direct glare with your hand, or step into a position where you can see it comfortably. Look at the actual subject as well as the preview: the screen is a guide, but reflections and brightness can affect what you think you see.
Check the edges of the frame for a window strip, reflector, chair back or bright patch of table that pulls attention from the bowl. Keep the focus on the light question here: if a bright window edge remains visible, changing your shooting angle may remove it without moving the bowl again. If it cannot be excluded without cutting off the fruit, try a small change in framing rather than a dramatic crop.
Take one frame, review it, and enlarge the area where the strongest highlight falls. Look for a little texture on the orange peel and a readable outline where the fruit meets the bowl. Then inspect the shadows: they should help separate the fruit, not turn the back of the bowl into an indistinct dark patch.
In the invented scene, the photographer reviews the image and sees a faint reflection of the window on the table. By stepping sideways and turning the phone a little, the reflection shifts away from the lower edge. The expected result is a cleaner view of the tabletop while the side-lit fruit keeps its shape.
Reviewing one frame is more useful than taking a long burst from an unchanged position. Make a small adjustment, then look for a specific change.
When is a small light adjustment enough?
Sometimes the scene only needs a modest change. A thin curtain can soften direct sun, but it may also alter the light’s colour or make the whole room dimmer. If you use one, check that it hangs evenly and does not create a new stripe or fold shadow across the subject.
A translucent white curtain is different from a heavy coloured drape. The first may diffuse the incoming light; the second may block much of it or tint what passes through. If the available fabric gives the oranges an unwanted cast, open it again and rely on moving the bowl or changing your angle.
You can also use the room itself. A pale wall can provide a gentle bounce, while a dark wall may deepen the shadows. Moving the subject nearer to a light-coloured surface can change the balance without adding anything to the table. Check the result rather than assuming that a particular wall or curtain will behave the same in every room.
For the imagined bowl, the photographer tries the curtain only after finding a better position. The expected visible result is a broader, less sharply edged patch of light across the fruit. If the scene becomes flat or the colour shifts, the curtain is not helping this composition; the more useful choice is to open it and return to the side angle.
What does the finished frame need?
The final frame in this invented walk-through comes from several small decisions: moving the bowl away from the direct sun, rotating it to show the leaf, standing slightly to one side, and using white card to soften the darkest area. The expected result is a bowl with readable texture, a gentle shadow that still gives it depth, and no dominant patch of glare on the rim.
That result is not a recipe for every window. A north-facing room, a deep sill, a sheer curtain or a glossy subject will all change what a useful angle looks like. Keep the sequence flexible: notice the strongest light, shift the subject, move your viewpoint, then decide whether the shadows need a little reflected light.
If the window itself remains the brightest and most distracting part of the scene, turn the arrangement so it is not in the frame. If the fruit becomes too dark from that position, return to a three-quarter view and try the white card again. The right adjustment is the one that keeps the subject clear while letting the light still feel directional.
Before you leave the table, make one last check for colour and glare. A white bowl should not pick up a strong tint from nearby objects, and a bright reflection should not cover the detail you wanted to show. Then stop moving things: once the light and angle support the subject, another round of adjustments can easily make the scene less natural.